WELCOME TO GITHUB!!


![]()
Why contribute to free/open source?
When you contribute to Open Source, you are taking part in the collaborative effort of a vast community of passionate developers and contributors! Free Source software allows you to see, use, and more importantly modify its source code. Contributing to Free Source is a great way to develop a deeper understanding of software, and the best part is being able to learn and teach alongside a community of contributors.
How to contribute
Follow this step-by-step guide to make your first open source contribution. The steps you will perform in this guide is a somewhat standard workflow that you will encounter in most projects: Fork -> Clone -> Install dependencies -> Make your changes -> Run tests -> Commit -> PR
This project is to help you make a pull request (PR) in 10 easy steps
Instructions-
If you don’t have git on your machine, install it.
Optional Step
Configure Git Bash
 git config --global user.email "<your email>"
 git config --global user.user "<github username>"
Use your email and username as given on your github account
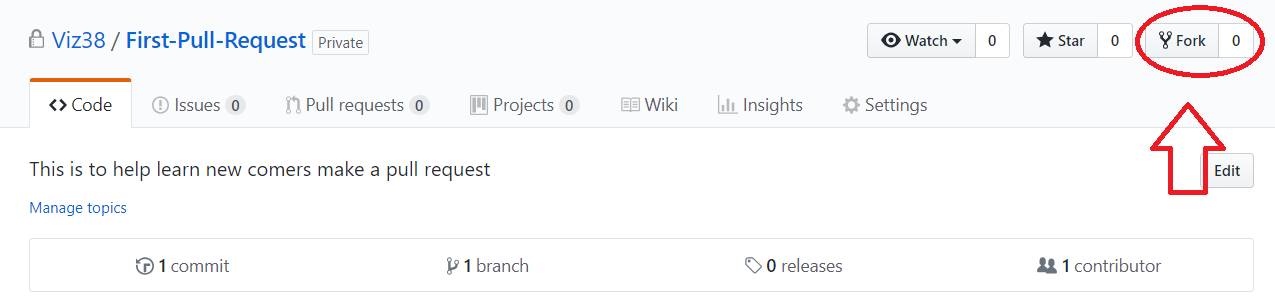
Step 1
Fork THIS repository by clicking on the fork button on the top of this page.
This will create a copy of this repository in your account.
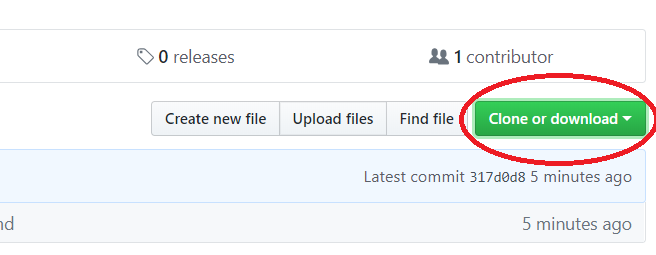
Step 2
Now clone the forked repo to your machine. Go to your GitHub account, open the forked repo, click on the clone button and then click the copy to clipboard icon.
Step 3
Open a terminal/git bash and run the following git command:
git clone "<paste the link here>"
Step 4
Change to the repository directory on your computer (if you are not already there):
cd First-Pull-Request
Now create a branch using the git branch command and change to new branch using git checkout command:
(Replace ‘branch-name’ with any name of your choice)
git branch <branch-name>
git checkout <branch-name>
For example:
git branch newbranch
git checkout newbranch
Step 5
Now open Members.md file in a text editor, Add yourself as given.
vi Members.md
Save and exit by pressing [ESC] key and type in :wq
Step 6
Add the changes you’ve made to git by hitting the following command
git add Members.md
Step 7
Now commit those changes using the git commit command:
git commit -m "give your commit message here"
Step 8
Push your changes using the command git push:
git push origin <add-your-branch-name>
replacing <add-your-branch-name> with the name of the branch you created earlier.
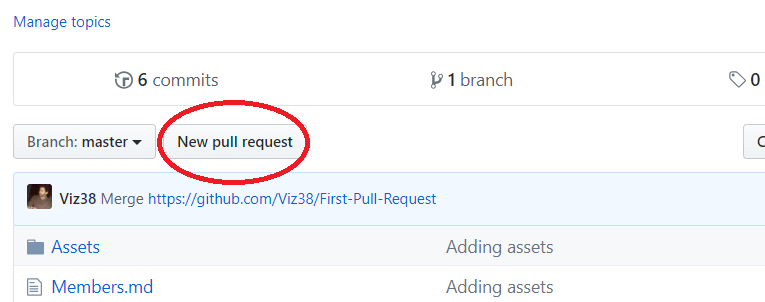
Step 9
If you go to THIS repository on GitHub, you’ll see a Compare & pull request button. Click on that button.
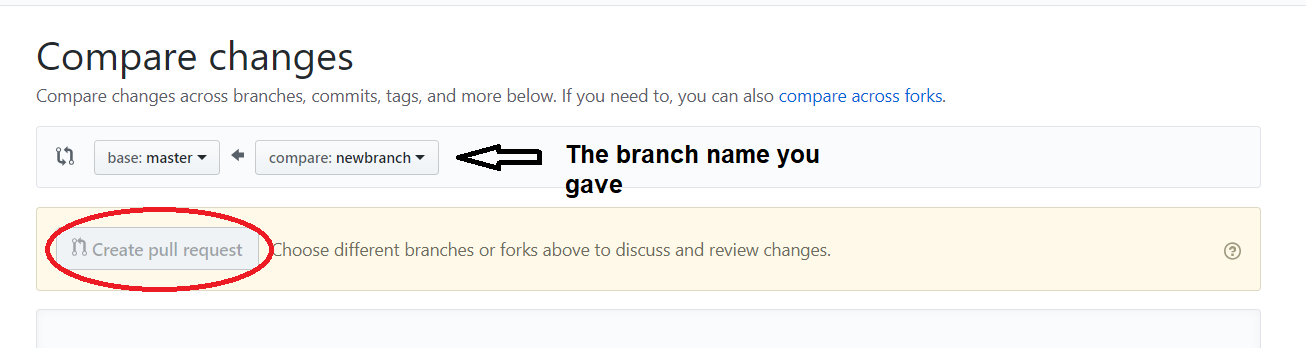
Step 10
Now submit the pull request.
Soon I’ll be merging all your changes into the master branch of this project. You will get a notification email once the changes have been merged.
GLUG PACE Click Here for more projects. 🌟🌟
Congrats you just created a PR 🎉🎉🎉
What’s next?
🎉 Congratulations 🎉
You just took your first step as an open source contributor. Your pull request will be reviewed as soon as possible.If you feel like it, please give this repository a star ⭐.
If you want something more to work on, look at the Further Reading section for more great learning resources.
FAQ
Resolve Merge Conflicts
Once changes have been committed and staged it’s time to manage conflicts by running:
git pull upstream master Head back to your favourite code editor and review any conflicts. Generally current changes will be highlighted in one color and incoming changes will be highlighted in a different color. Accept the current or incoming changes.
Commit changes again as outlined in step #9 and #10 above or by running:
git add -A
git commit -m "Your message"
git push origin <your-new-branch-name>
Further Reading
- GitHub Open Source Guide
- Resource To learn Git
- Git Tutorial Part 1: What is Version Control?
- Git Tutorial Part 2: Vocab (Repo, Staging, Commit, Push, Pull)
- Git Tutorial Part 3: Installation, Command-line & Clone
- Git Tutorial Part 4: GitHub (Pushing to a Server)
- Git & GitHub Crash Course For Beginners
- Git Magic
- Friendly Beginner Repos
- GitHub Endorsed Beginning Contributer Repos
- Sourcetree - Git GUI for macOS and Windows
- VS Code - extensible code editor
- GitHub Atom - Hackable Text Editor for the 21st Century
CHEAT SHEET
- Here is a Cheat Sheet from Github for further reading 👉Cheat Sheet👈